If i have a wee bit of trouble getting the piston to slip back in i use a G clamp to push the piston fully in
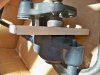
once the piston is in place you can then fit new pads there are 2 brake pads one is fixed in the calliper with a screw through a mounting plate this pad needs to be fitted first
the other pad is a floating pad that sits in a floating frame and is held in place by a spring clip
if you look at the floating frame there is an extension with a hole through it the hole is for the mounting pin
near the hole is a protruding rivet with a flat head that rivet will sit in a wee cut out on the floating part of the calliper where the pin hole is there are three cut outs available on that floating head just ensure there is one of those cut outs lined up to fit the rivet into with the rivet head being locked in place
ensure the spring clip is fitted to the top of the floating frame where the cut out for the extension on the top of the pad fits the end of the spring should be pointing in a way to block the pad from being fitted and also pointing in the opposite side from the rivet mentioned earlier
place the bottom of the pad in the frame and hold it so that the back of the extension is against the spring clip by applying pressure on the pad extension the spring clip will fold back and allow the pad extension to sit in it's slot with the spring clip pushing down on the top of the extension
You can now fit the floating frame with pad in it back into the calliper ensuring the rivet sits in it's wee slot
fit the calliper back on to the bike and refit the pins to hold it in place
ensure you operate the front brake a few times to seat the pads against the disc take it easy for a while as new pads take a wee bit of use to become fully effective
Brian
")