
jmpancoast
Active Member
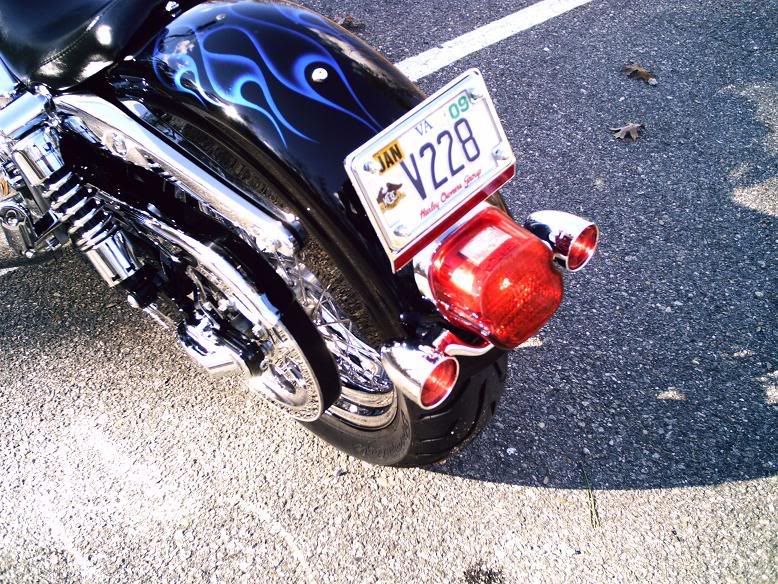
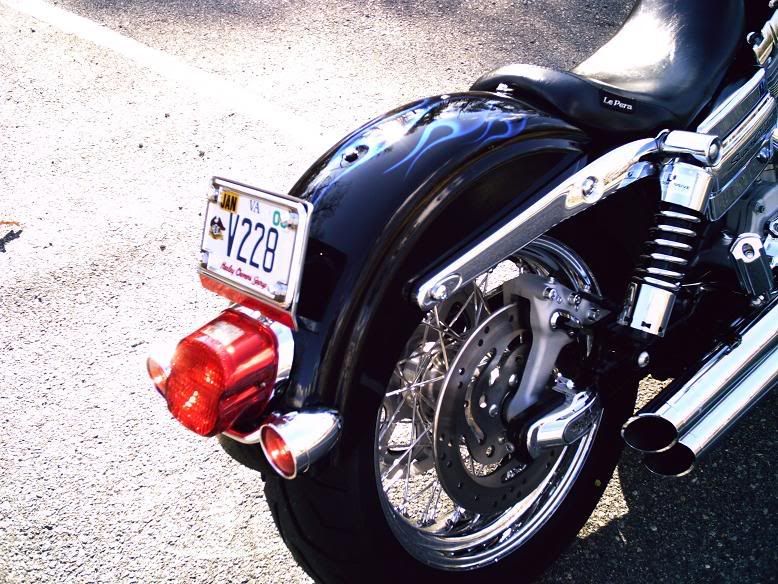
The set-up I used was the Harley 68615-04. MSRP was $147.95.
I bought these because my 06 Super Glide is lowered and I was tearing up the stock rear signal wiring, even with the stock 160 tire. I bought a 180 tire and knew something had to be done to rid myself of the electrical headaches I was experiencing. I stole the idea from another owner who had used these signals on a similar model bike.
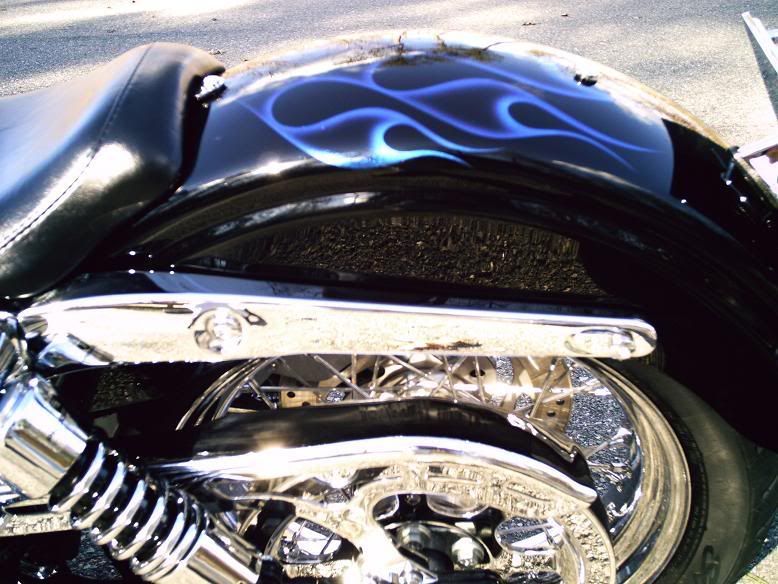
Because the contour of the fenders on the touring bikes differ from the Dynas, some modding had to be done to make this signal bar work. A few minutes on a bench grinder took care of this. I had to reshape the mounting points on the signal bar to match the curvature on my fender. I also had to drill two holes in the fender to mount these. I was a little skeptical doing this because it required me taking a drill to a brand new paint set.
I purchased a piece of aluminum stock (1/8" x 3/4") and used it to make a template for the mounting holes. I secured it to the fender with two-sided body side molding adhesive tape.
I was concerned about the weight of the signal bar vibrating on the sheet metal, so I used this aluminum template as a under-fender bracket to beef-up the rigidity of the mounting points. I elongated the mounting holes on the aluminum bracket so they would line up properly when placed under the fender. Worked great and felt very solid. I cut some pads from a sheet of rubber to place between the signal bar mounting points and the fender.
Last, the routing of the wiring. I simply cut two slits in the bottom of the chrome plastic taillight base and ran the wiring through these slits underneath the red lens.
Moving the signals left me with vacant holes in the rear fender struts. I used the oval chrome slugs which come with the detachable mounting hardware kit to cover these holes. I bought a set of chrome rotor torx head bolts to secure the strut covers.
Here is a very rough diagram of the shape I was shooting for as I had the signal bar on the grinder. This is only to give you a visual and is not to scale or proportionate.

Here are a couple more pics of the mounted signals.
Probably took me longer to compose this post than it did to install these lights. Pretty easy to do and looks great. Let me know if you have any questions.
John
I bought these because my 06 Super Glide is lowered and I was tearing up the stock rear signal wiring, even with the stock 160 tire. I bought a 180 tire and knew something had to be done to rid myself of the electrical headaches I was experiencing. I stole the idea from another owner who had used these signals on a similar model bike.
Because the contour of the fenders on the touring bikes differ from the Dynas, some modding had to be done to make this signal bar work. A few minutes on a bench grinder took care of this. I had to reshape the mounting points on the signal bar to match the curvature on my fender. I also had to drill two holes in the fender to mount these. I was a little skeptical doing this because it required me taking a drill to a brand new paint set.
I purchased a piece of aluminum stock (1/8" x 3/4") and used it to make a template for the mounting holes. I secured it to the fender with two-sided body side molding adhesive tape.
I was concerned about the weight of the signal bar vibrating on the sheet metal, so I used this aluminum template as a under-fender bracket to beef-up the rigidity of the mounting points. I elongated the mounting holes on the aluminum bracket so they would line up properly when placed under the fender. Worked great and felt very solid. I cut some pads from a sheet of rubber to place between the signal bar mounting points and the fender.
Last, the routing of the wiring. I simply cut two slits in the bottom of the chrome plastic taillight base and ran the wiring through these slits underneath the red lens.
Moving the signals left me with vacant holes in the rear fender struts. I used the oval chrome slugs which come with the detachable mounting hardware kit to cover these holes. I bought a set of chrome rotor torx head bolts to secure the strut covers.
Here is a very rough diagram of the shape I was shooting for as I had the signal bar on the grinder. This is only to give you a visual and is not to scale or proportionate.
Here are a couple more pics of the mounted signals.
Probably took me longer to compose this post than it did to install these lights. Pretty easy to do and looks great. Let me know if you have any questions.
John