funkyskunk
Member
Hey there guys, this is a review on the "GEN 3" Electronic Jet Kit brought to you by Doebeck Performance. I would like to say this was, oddly enough, my first install of a TFI on a bike to date, and I have owned over 10 bikes so far. Having said that I am no mechanic but do have a little experience working on bikes in general. When I had the unit in my hand and was getting ready to install it, I must admit I was expecting more to be in the plastic container I received: 1 sheet of paper instructions, couple tie wraps and a small box with a few wires attached to it, oh and a small reference card to record the preset setting. Good call! So maybe this doesn't need to be big to work, let's get to the install.
This being my first Harley, a 2005 Electra Glide Classic, I was a little hesitant before starting the project. What could go wrong????
1. Start by removing the seat.
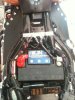
2. Disconnect the negative battery terminal.
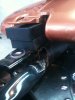
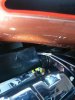
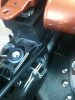
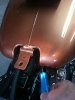
3. Remove the tank hold down bolt and loosen the neck bolts to allow the tank to pivot.
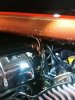
4. Prop up the tank enough to get yer small little hands in there. If you can! If not you may need to remove the tank but that's not my prob.")
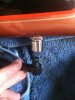
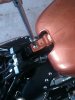
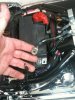
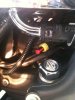
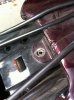
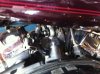
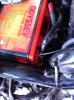
5. Remove stock harness and replace with EJK harness then plug stock harness into EJK piggyback. Repeat for other cylinder.
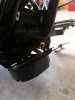
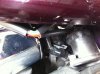
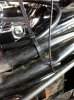
6. Route all wires back along the frame and tie wrap accordingly.
7. Reconnect negative terminal including the black ground cable that powers the unit.
8. Put the bike back together and FIRE IT UP! Sweet, all is well.
Of course all this work was done at the end of the riding season and I only had a couple rides to test out the new mod. There was a little more snap in the throttle then there was before but nothing earth shattering. I will have to wait until next season to truly play with it.
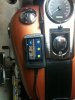
2011 Season starts with a new Arlen Ness Big Sucka Stage One A/C, so now with the EJK and the intake installed, I start to test the bike out a bit more. First off, the controller is a bit sensitive but with a little getting used to and remembering what colour light does what, you can navigate through changes easily enough to do it on the fly if you like. Definitely more power but the bike feels very bogged down due to the factory pipes. Stage 1 exhaust is a definite must. Unsure if there were any other issues, I did a compete fluid flush and replaced the plugs in order to get the best possible results after the exhaust arrives.
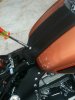
With a new set of Python Slip-ons in hand, I plan to complete the transformation and should be doing wheelies in no time with my full stage one done. I removed the stock exhaust and replaced it with the nearly hollow Python pipes. This should do the trick. I fire the pig up and WOW she got loud. Let's go for a ride. On the road I can notice the improvement right away. More power and better response, BUT there is a horrendous popping and backfiring issue on decel and occasionally when shifting gears. I talked to the team at Doebeck and they told me to cut the decel fuel back a notch and if that doesn't work try going up a notch. Tried both and no luck. I run the cruise fuel down a step and the others are stock. Checked the exhaust for leaks, nothing! Going to check the intake for leaks today. If not, I may try reducing the size of the baffle down to 1 3/4" from 2".
As a unit, the "GEN 3 Electronic Jet Kit by Doebeck Performance" was extremely easy to install and gives the user a lot of options when it comes to adjusting the different modes. The ability to change the settings on the fly is great, small size lets you stash it where ever you like and technical support was available quickly both times I needed it.
I have heard of the new GEN 4 with the air to fuel gauge and am quite excited to hear all about it soon.
few more pics...
This being my first Harley, a 2005 Electra Glide Classic, I was a little hesitant before starting the project. What could go wrong????
1. Start by removing the seat.
2. Disconnect the negative battery terminal.
3. Remove the tank hold down bolt and loosen the neck bolts to allow the tank to pivot.
4. Prop up the tank enough to get yer small little hands in there. If you can! If not you may need to remove the tank but that's not my prob.
5. Remove stock harness and replace with EJK harness then plug stock harness into EJK piggyback. Repeat for other cylinder.
6. Route all wires back along the frame and tie wrap accordingly.
7. Reconnect negative terminal including the black ground cable that powers the unit.
8. Put the bike back together and FIRE IT UP! Sweet, all is well.
Of course all this work was done at the end of the riding season and I only had a couple rides to test out the new mod. There was a little more snap in the throttle then there was before but nothing earth shattering. I will have to wait until next season to truly play with it.
2011 Season starts with a new Arlen Ness Big Sucka Stage One A/C, so now with the EJK and the intake installed, I start to test the bike out a bit more. First off, the controller is a bit sensitive but with a little getting used to and remembering what colour light does what, you can navigate through changes easily enough to do it on the fly if you like. Definitely more power but the bike feels very bogged down due to the factory pipes. Stage 1 exhaust is a definite must. Unsure if there were any other issues, I did a compete fluid flush and replaced the plugs in order to get the best possible results after the exhaust arrives.
With a new set of Python Slip-ons in hand, I plan to complete the transformation and should be doing wheelies in no time with my full stage one done. I removed the stock exhaust and replaced it with the nearly hollow Python pipes. This should do the trick. I fire the pig up and WOW she got loud.
Let's go for a ride. On the road I can notice the improvement right away. More power and better response, BUT there is a horrendous popping and backfiring issue on decel and occasionally when shifting gears. I talked to the team at Doebeck and they told me to cut the decel fuel back a notch and if that doesn't work try going up a notch. Tried both and no luck. I run the cruise fuel down a step and the others are stock. Checked the exhaust for leaks, nothing! Going to check the intake for leaks today. If not, I may try reducing the size of the baffle down to 1 3/4" from 2". As a unit, the "GEN 3 Electronic Jet Kit by Doebeck Performance" was extremely easy to install and gives the user a lot of options when it comes to adjusting the different modes. The ability to change the settings on the fly is great, small size lets you stash it where ever you like and technical support was available quickly both times I needed it.
I have heard of the new GEN 4 with the air to fuel gauge and am quite excited to hear all about it soon.
few more pics...
Attachments
-
 iphone 019.jpg73.2 KB · Views: 81
 -
 iphone 026.jpg38.9 KB · Views: 79
 -
 iphone 027.jpg65.5 KB · Views: 78
 -
 iphone 029.jpg60.3 KB · Views: 78
 -
 iphone 030.jpg66.4 KB · Views: 78
 -
 iphone 034.jpg68.4 KB · Views: 79
 -
 iphone 033.jpg60.7 KB · Views: 73
 -
 iphone 031.jpg37.4 KB · Views: 77
 -
 iphone 032.jpg49 KB · Views: 73
Last edited by a moderator: